SCREEN OVERVIEW
The Deal Pipeline Screen
What is the deal pipeline screen?
The purpose of this screen is to give you a control center to manage all of your deals in one place as you move them closer to close, one step at a time.
How does the screen work?
The screen contains a pipeline of all deals and what sales stage they are in, as well as the ability to view deal, contact, property, and more information. You can see what agents are in campaigns, add tags to deals if there are pending items you need a reminder of, and pin properties to the top of columns.
Layout
- Pipeline Board
- Deal Panel
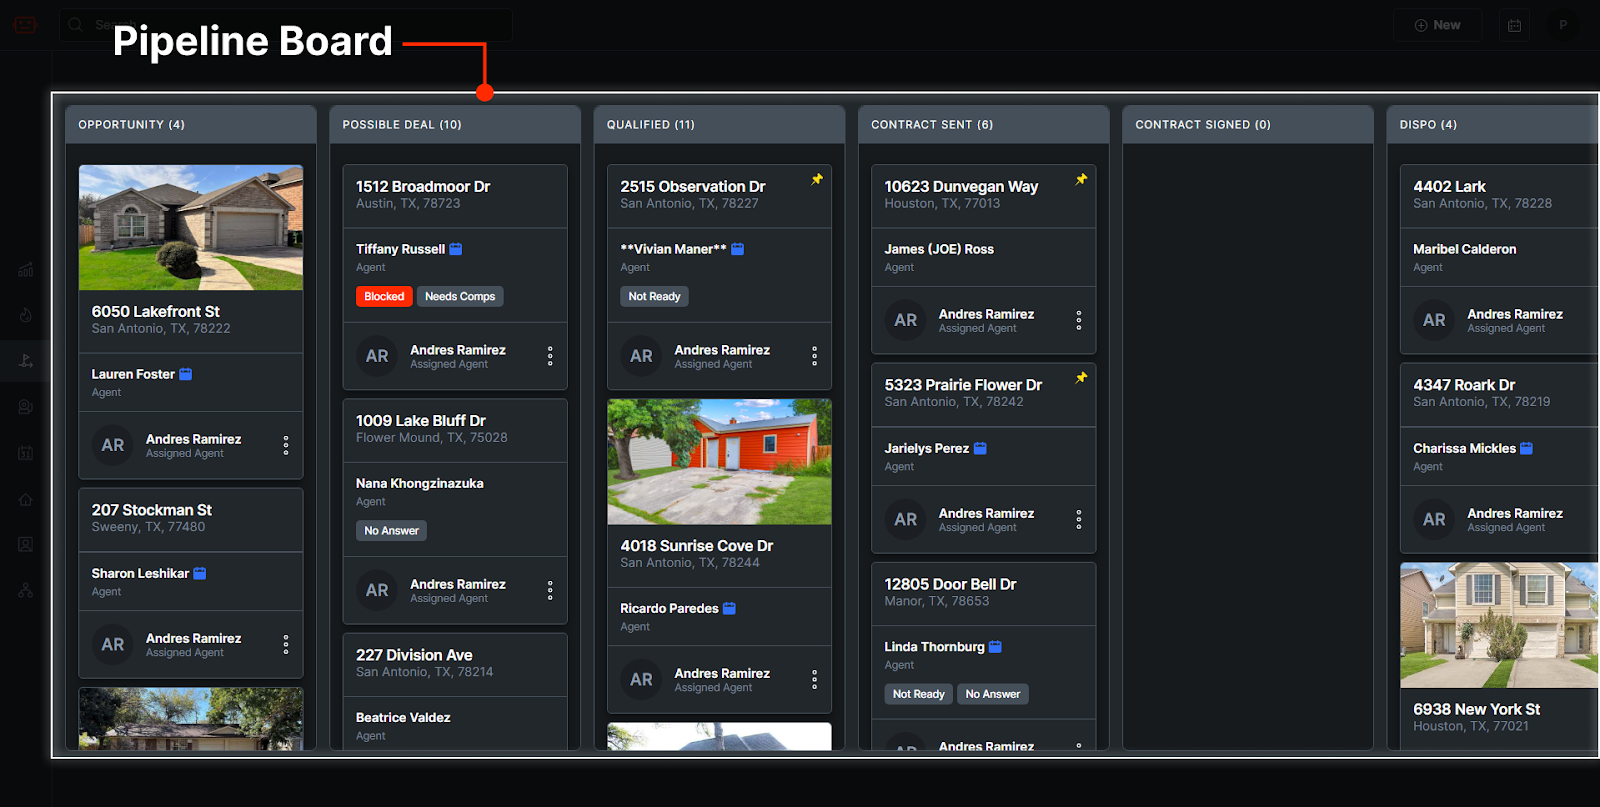
Pipeline Board
The acquisition manager moves deals through various stages as they move through the sales process.
Stages / Columns
The stages can be viewed in the columns at the top of the Pipeline Board.

There are many columns on the deal pipeline screen that are used to categorize deals in different stages. They are as follows:
Opportunity
This is where new deals show up when they are given by an agent or added by a lead manager from the Lead Generation screen.
Possible Deal
Deals in this column have been looked at for the first time and are being considered. This is when you would reach out to an agent about the property to collect and fill out Facts information. This is also the stage a deal is in when you are running reports to identify possible MAOs and offers.
Qualified
This is for deals that you know are good enough to make an offer on, but a contract has not been sent yet. Once a deal has comps, Facts has been filled out, and a published report has been created so you know the deal can work, it enters the Qualified column. During this time you would make a verbal offer to the agent.
Contract Sent
This column is for deals that have had an offer generated and sent to a contact in the Offer Tab.
Offer Tab Articles
Contract Signed
If a deal’s offer is accepted and the contract is signed, it should be put in this column.
Dispo
A deal in this column has a signed contract, and you are currently finding buyers for it.
Won
These deals have been funded and closed.
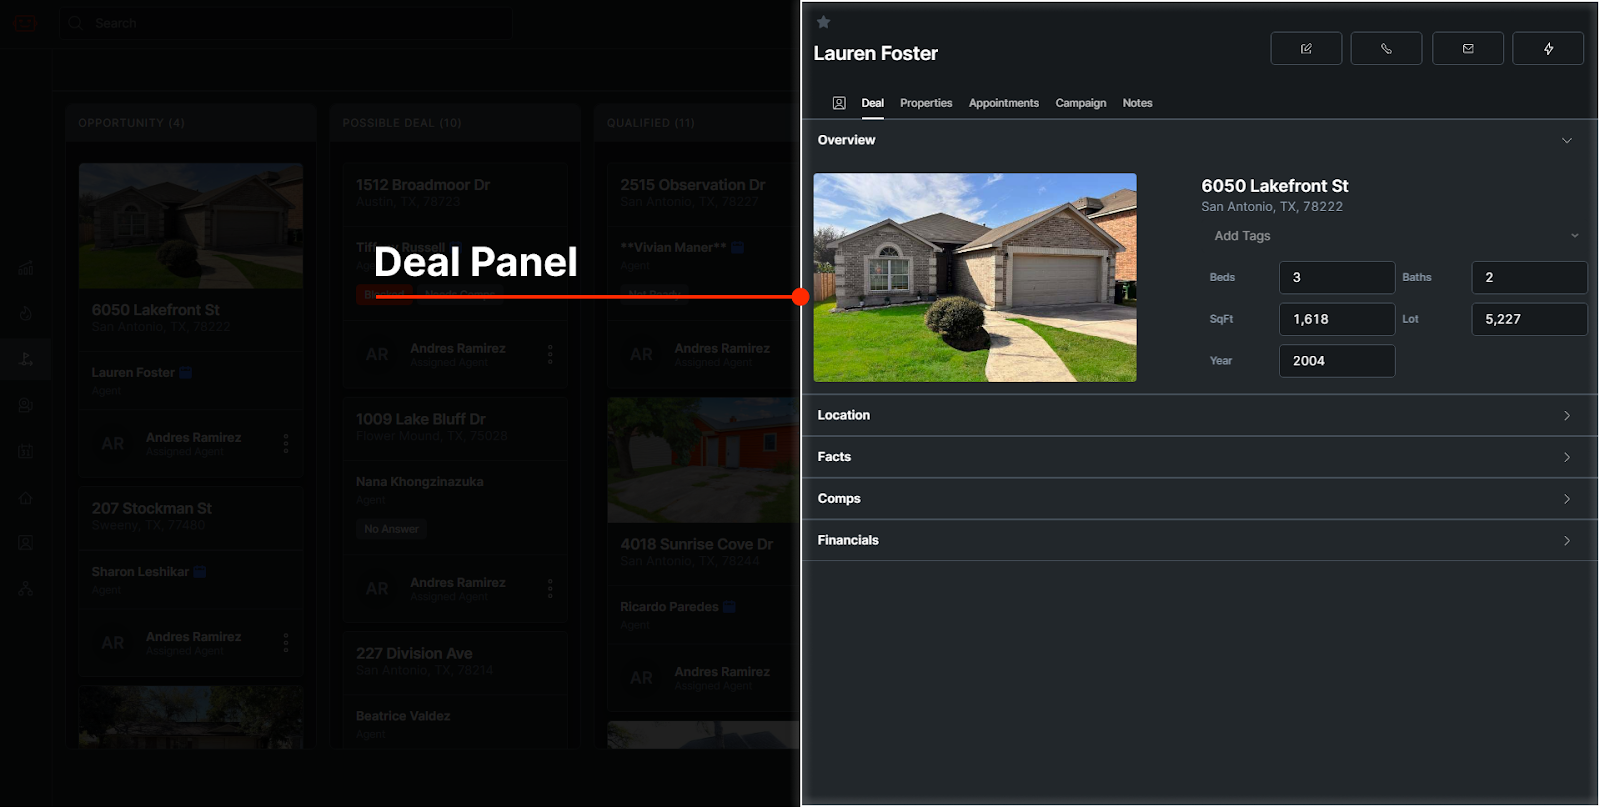
Deal Cards
Each deal is represented by a card. An example card looks something like this:
Each card has an image of the property, the address, the primary contact, and the team member assigned to the deal. Additionally, agents who are in a campaign have a red bell icon, and agents who have a scheduled appointment have a blue calendar icon.
Deal Card Context Menu
Each card also has three dots on the bottom left that open up extra actions.
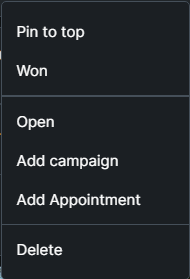
Pin to Top
This pins the deal to the top of the column, making it easy to keep track of certain deals without having to scroll.
Won
Mark a deal as closed and funded.
Open
This opens the Qualify Screen for the property on the deal, so you can fact find, run reports, and send offers.
Add Campaign
This allows you to put the contact in a campaign.
Add Appointment
This allows you to create an appointment for the contact.
Delete
This deletes the deal. This action is irreversible, however the property and the contact will not be deleted.
Deal Panel
The Deal Panel is where you can view all of a deal’s information and more. You can click on a deal card to view its information in the Deal Panel.
Top Section
In the top section of the Deal Panel, you can view the contact’s name, if they have an appointment or campaign, and more.
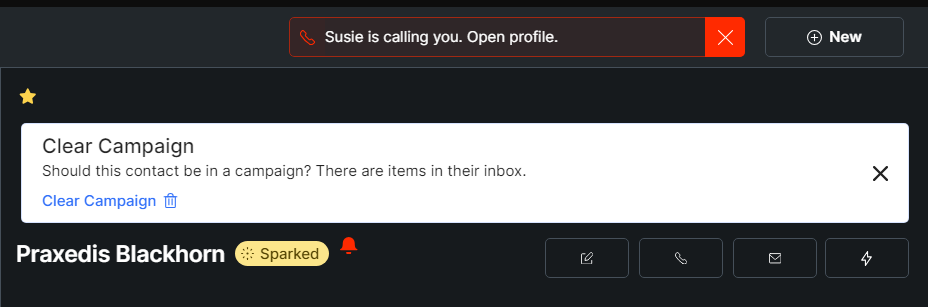
You can star a contact in the top left. A star means that they’re an important contact, or a VIP. The temperature is visible next to the contact’s name. A blue calendar icon means they have an appointment scheduled. A red bell icon next to the temperature means the contact is currently in an active campaign. If the contact has sent a message, Effie will ask you if they should still be in a campaign considering they have replied.
Action Buttons
There are a few buttons on the right side of the deal panel that achieve different functions.
 This button opens the Qualify Screen for the contact.
 This button calls the contact.
 This button sends an email to the contact.
 This button allows you to perform several actions:
-
Google the contact’s name
-
Send the contact a copy of your Buy Box email
-
Send the contact a copy of your Welcome Packet email
-
Create a new appointment with the contact
-
Start a new campaign

Tabs
There are several tabs in the deal panel:

View contact information such as name, phone number and email, and add contact notes
In the contact tab, you can view and change various contact information. Click any field you want to edit, or click the copy buttons next to the phone or email to copy them to your clipboard. You can also change the contact’s temperature, which you can learn more about in the Lead Generation screen overview. Contact-specific notes can be left here which are visible by all team members.
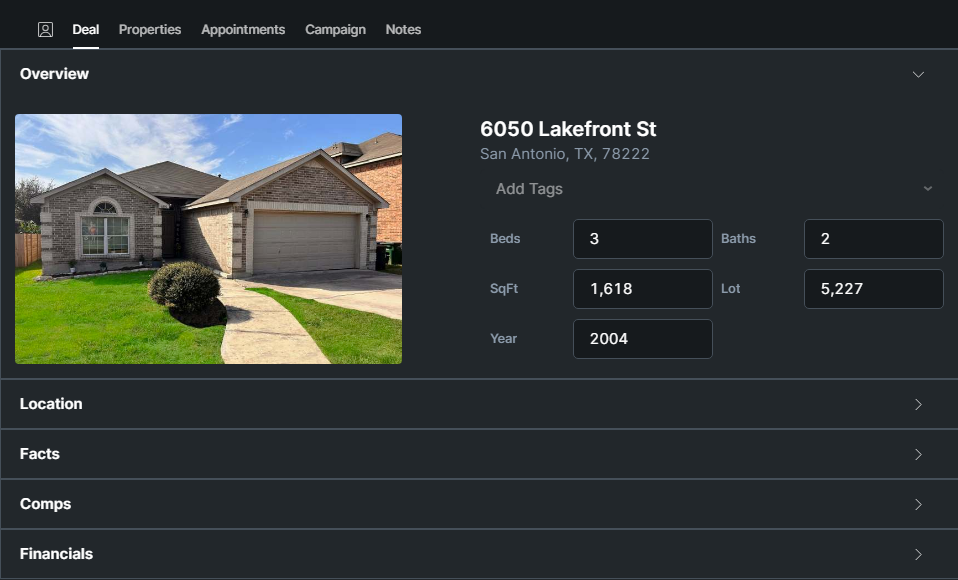
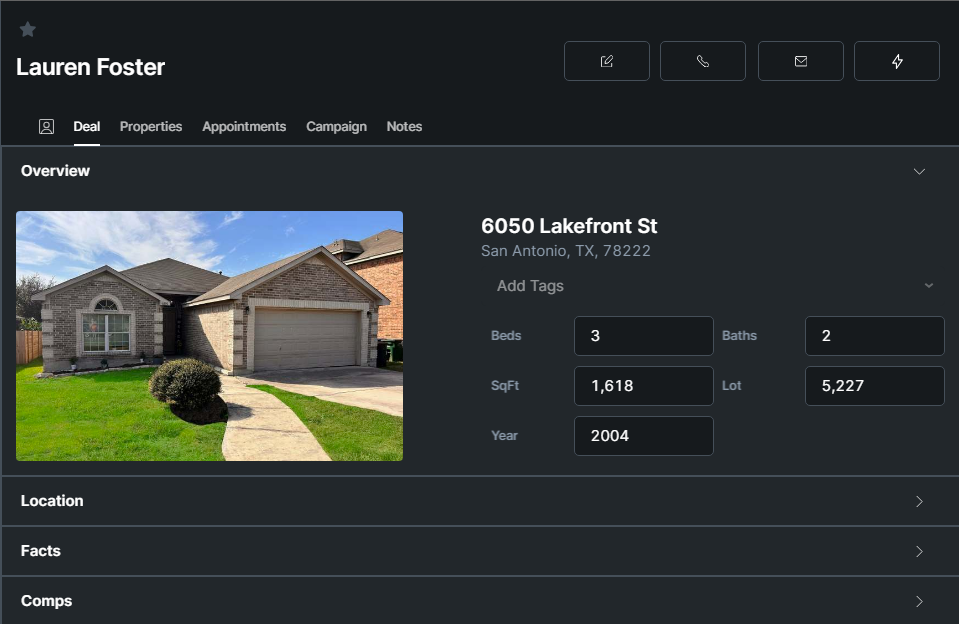
View a deal overview, including the property info, location, facts, comps, and financial information
This tab stores all of the information about the subject property for the deal. You can edit information here, as well as add tags.
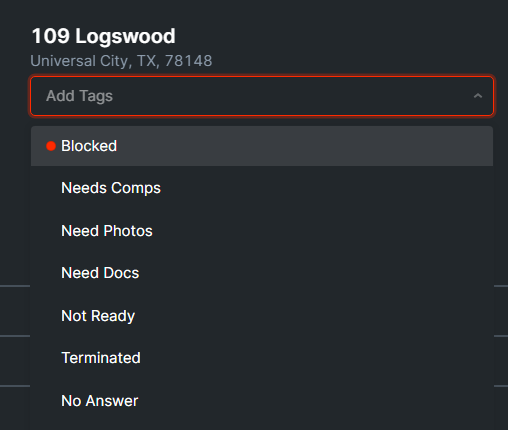
Deal Tags
Deal tags are simply reminders you can leave for yourself on a deal. Think of them like a sticky note you’d leave on something when you have to go out for lunch or leave the office for the day. They are not statuses, and are just created so you can remember what needs to happen next, or a team member can easily see what needs to happen next on a deal.
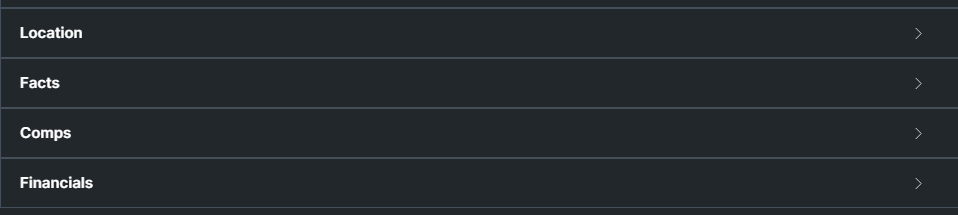
There are also three sections at the bottom of the deal tab:
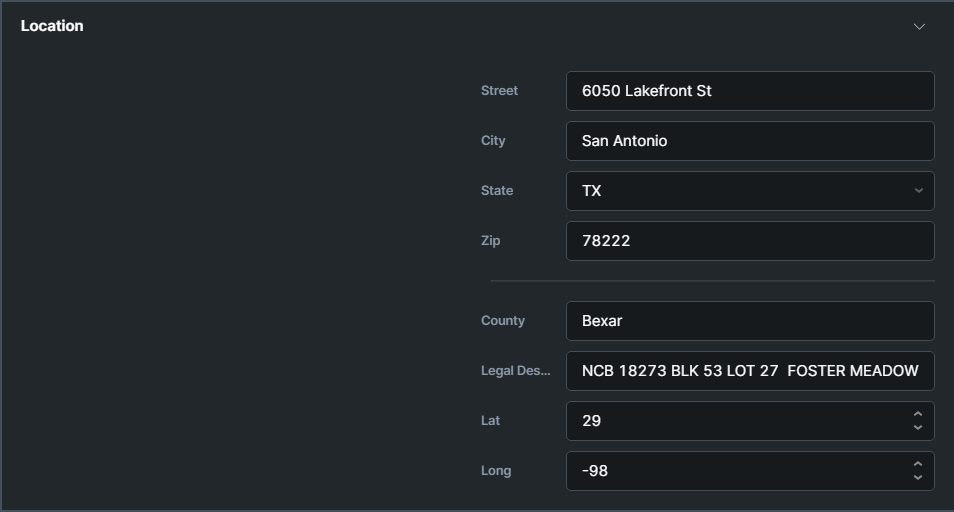
Location
This section allows you to view and edit more detailed location information for the property, including legal description and latitude / longitude.
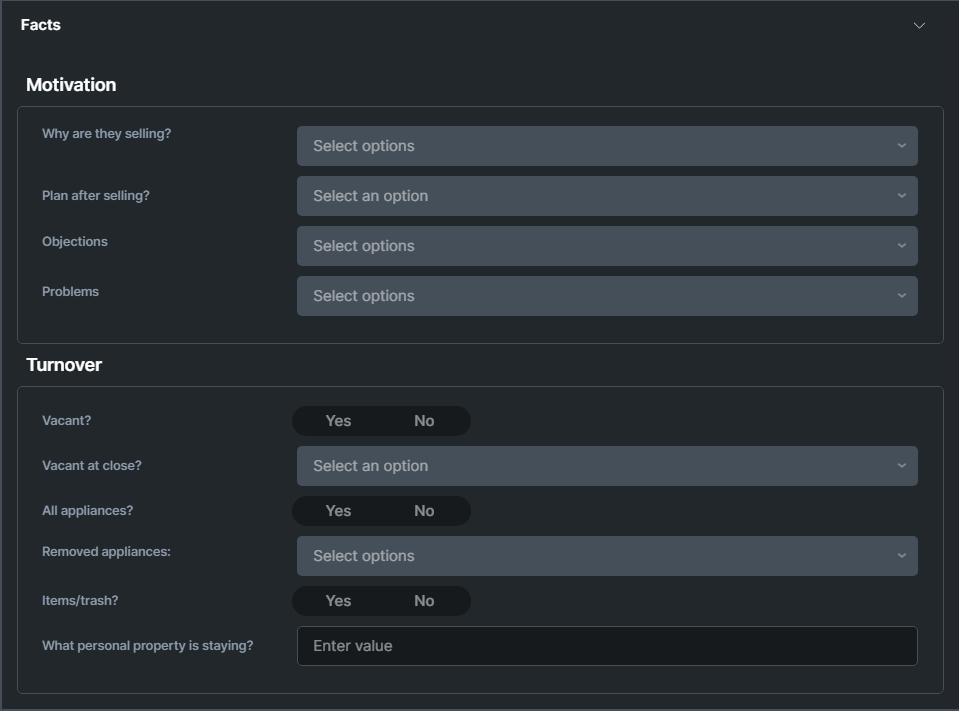
Facts
In this section, various information about motivation, property issues, mortgage info and more are filled out when speaking to the agent for the first time about the property.
Read more about Facts
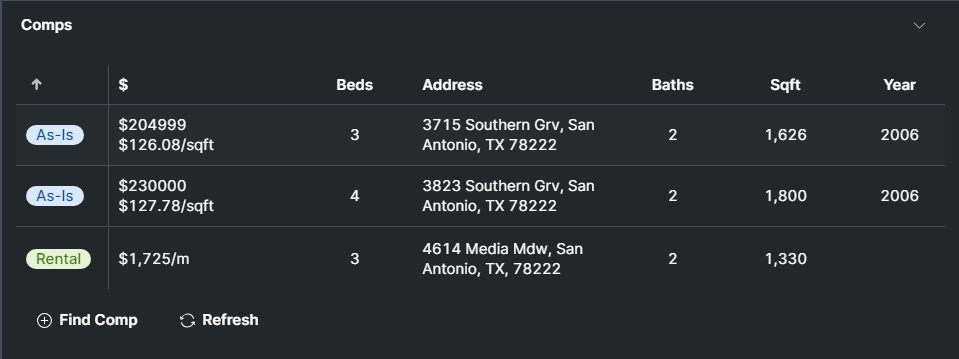
Comps
This section allows you to view and edit more detailed location information for the property, including legal description and latitude / longitude.
Read more about Adding Comps
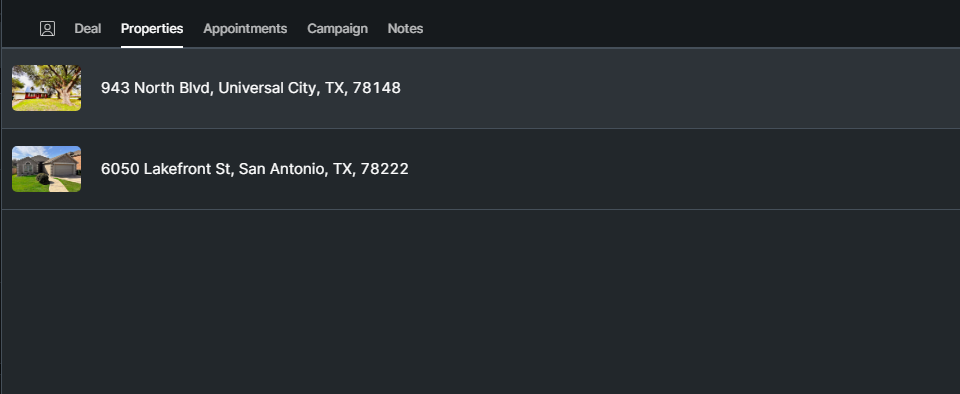
See all the properties connected to the contact
This tab shows all of the properties Effie has found to be connected to or listed by the contact. You can use this when speaking to an Agent to bring up other properties they might be willing to send you.
By clicking the three dots on the right side of a property, you can turn the property into a deal, which moves it to the Deal Pipeline Screen.
You can also add a property by clicking on the Add Property button at the bottom of the tab.
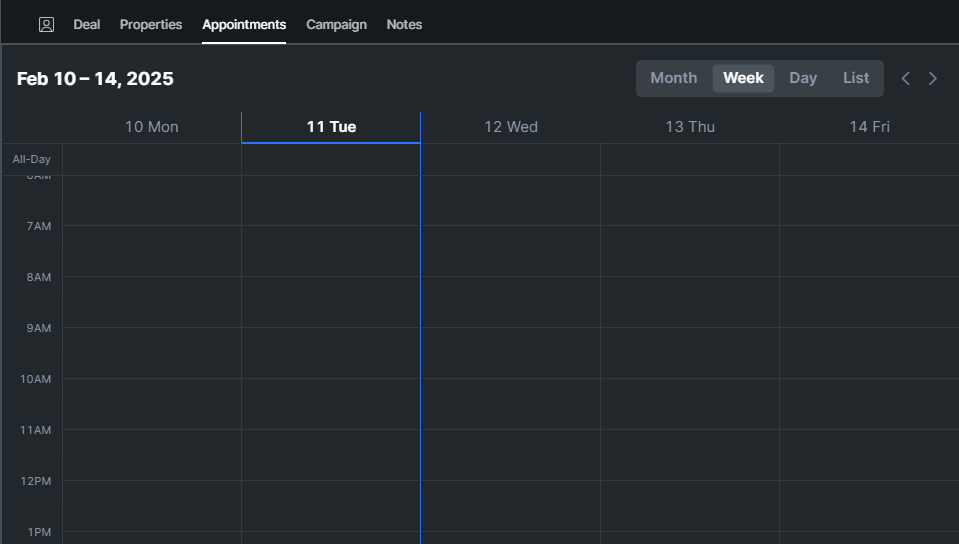
Add and view appointments
This tab is a calendar view that allows you to view, edit, and create appointments for that specific contact. On the top right you can change the view type. Simply click inside of the calendar on a time or day to create an appointment.

Add and view campaigns
In this view you can see what campaign the contact is currently in, if any, delete the campaign, or create a new campaign.
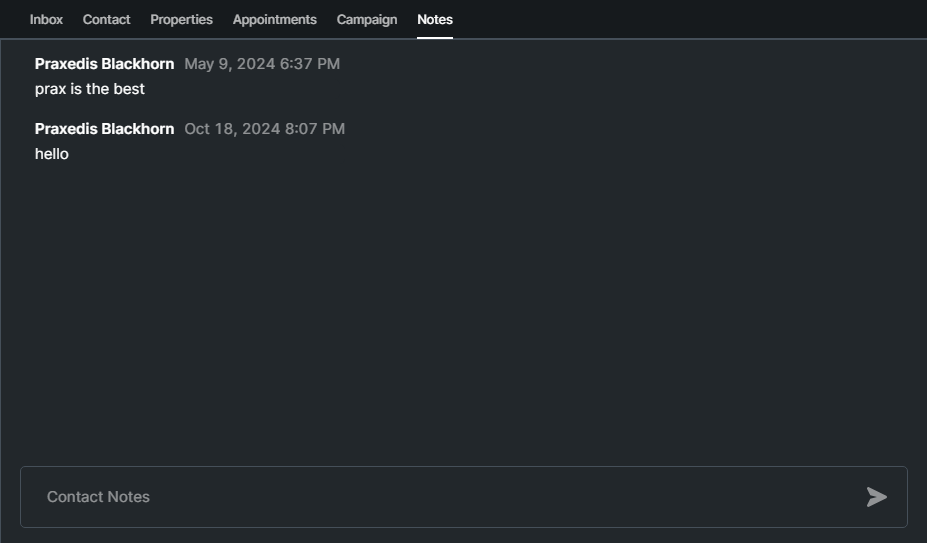
Add and view property notes
Add any relevant property notes here. These notes are specific to the property, not the contact, and can be seen by all team members.